Thursday 30 December 2010

Introducing: The Camaro!

OK, about time i gave this ol beast a proper write up.

Found her 20 minutes after selling the Supra due to RWD withdrawl symptoms. Arranged to collect it from south of Liverpool on what turned out to be the middle of the snow disaster season. Took the Passat down in an easy and simple 3.5 hour journey. Found the car in the pre-arranged services. Did the deal and went for a burger to absorb the gravity of the situation. I now own a 5.7 V8. Sweet.

Now for the journey home. Maneuvred out of the services, steering felt horrifically light compared to the Supra and Passat. Not a concern, these old Americans are known for being over assisted. Windows getting a touch wet... bugger. Comedy slow window wiper speed. Will need to watch that one. No immediate sign of the washer buton either but that could wait anyway, minus 5 degrees outside so no chance of them working. Lets just continue on and see how it is as we go.

As we rumble down the motorway i notice the driving position is horrible. Almost like im craning my neck to the side... too high up, too far back from the pedals and the steering wheel is sat on my lap. Gads. No obvious adjustment either... another thing on the list. Then the windows steam up. No heater. Then the car becomes cold. Very cold. No heat. This could be a loooong drive home.

Fast forward 2 hours. We have made it to Carlisle on one tank of fuel. Well, almost. ITs at a quarter, but since the speeedo, tacho, water temp, voltmeter and indicators dont work, im not taking any chances on the fuel gauge being a work of fiction or not. Refill costs 50 quid, so its got a pitifully small tank. I have managed to find a seat adjustment. The switch so handily pointed out as the electric mirror adjuster by the seller is infact the electric seat controls. So this car will obviously have some electrical gremlins to iron out. On the plus side, the engine pulls like a train and the headlights still work, so at least the thing will get home.

Another hour in and we reach Abingdon. I have to stop to allow my feet to defrost. Eventually discover that since pumpng a 500ml aerosol of antifreeze into the washer bottle, disassembling the hoses and scooshing them full of antifreeze and clearing the jets that the window washer does not work. Paranoia forces a basic headlight and brakelight check. These do work. Small blessings.

Finally get her home and immediately berth her for the night. Return to flat to rest feet onto radiator.

Next day. Nothing too drastic to be done as the Silvia is still in the lock up at this point awaiting its chariot to the skies. Decide to take her a blast around town to familiarise better in the daylight. Discover heat does penetrate the cabin when left on idle. Heater is thus not blocked. Discover that heater on the only setting that does work on the blower (the slowest, naturally) cannot combat the cold air blowing in through the shifter hole for the gearbox. Another job for the list.

Then discover yet more "niggles". Car howls like a typewriter chewing tinfoil on idle. This soon becomes apparent to be a noisy release bearing on the clutch. Easy fix. Less so is the most worrying fault of all. The second gear sounds like it is a straight cut affair. Hmm. Looks like the T5 box may not be as bombproof as the seller waffled on about.

Finally the silvia gets lifted and i ponder the next car to enter her space. The MR2is now untaxed, needs the wipers fixing (popped the linkages, have purchased second hand replacements), bonnet (avalanche landed on it) and at the minimum new engine bay coolant hoses (previous owner deemed 5 quid of antifreeze as a luxury buy. Hoses now haemmmoraging coolant).


So it needs towed town to be repaired. Camaro on the other hand is road legal and drives, so i decide to put her in first so i can assess a few things:

1. How "professional" has this RHD conversion been. Everything under the bonnet looks good but the clutch pedal squeaks a lot from the opposite side of the cabin on changes. My suspicions about this will later be confirmed true.
2. How awful is it behind that dashboard? Considering nothing works and a feckin childs drawing of gauges would be more accurate than the actual gauges, i suspect very awful indeed.
3. If all goes well a basic service might help, and an oil change is frankly a must.

As such the plan of replacing the Silvia with the MR2 is put on hold for a few weeks. Enter the Camaro.
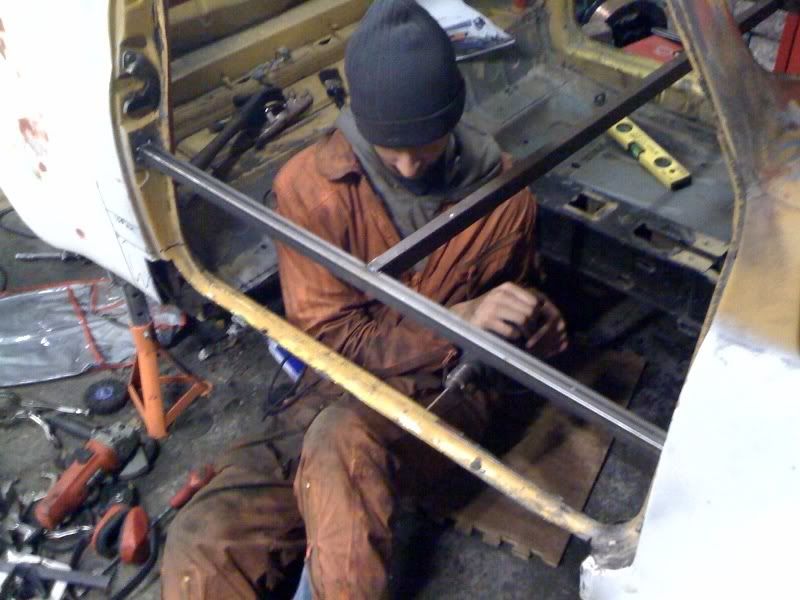
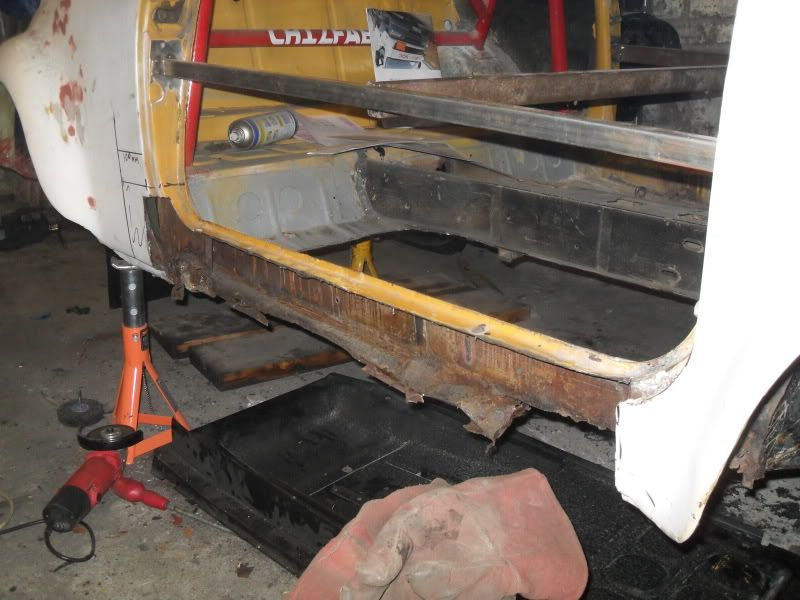
First up: Dash oot.

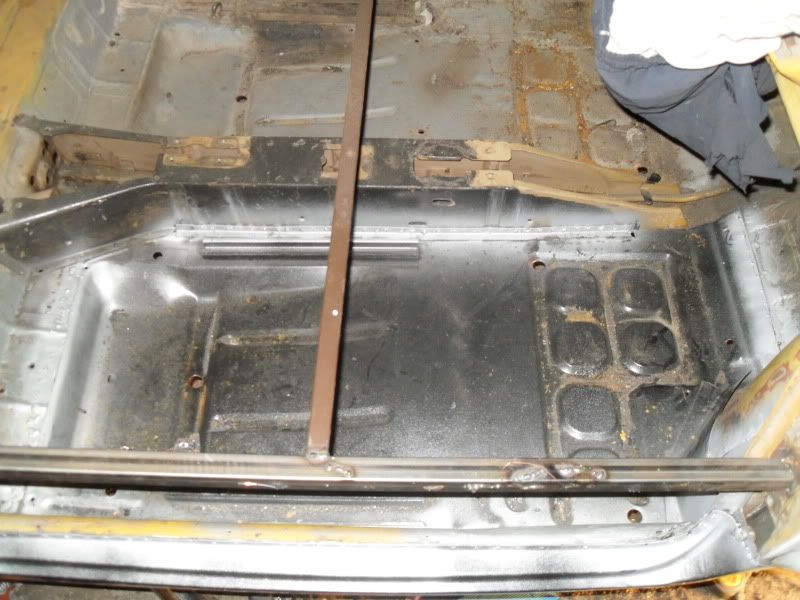
Those 2 iron bars running the length of the dash are exactly what i thought. Link bars for the brake and clutch. Beefy in design though, and properly welded in. Not too concerned about it as fiats and some golfs even run this system as a simple conversion for RHD. If its good enough for a factory design, its good enough for me. Bit of grease might help mind, as theres a fair squeak. Next up, the wee white dangly box in the passenger footwell. Thats the flasher relay for the indicators. 5 minutes getting warmed in my hand and it works too. Superb, easy fix for frozen indicators. Chalk that off the list.

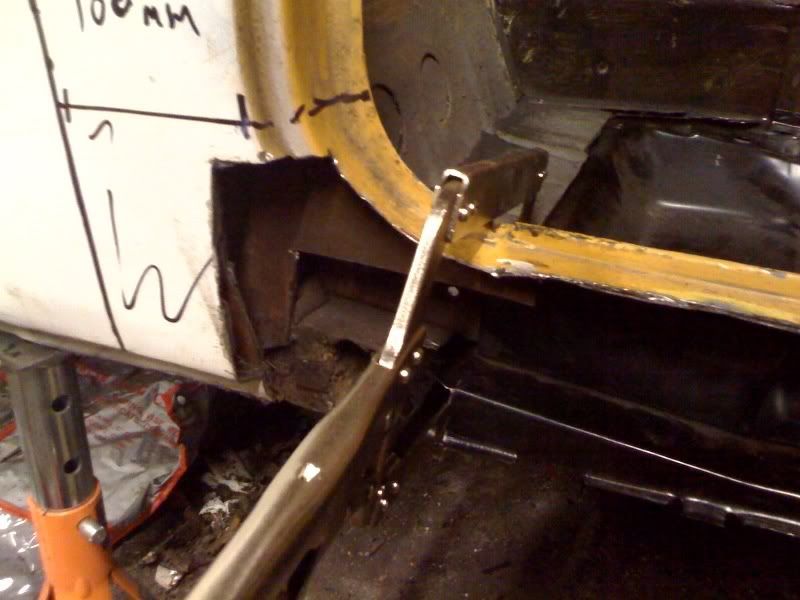
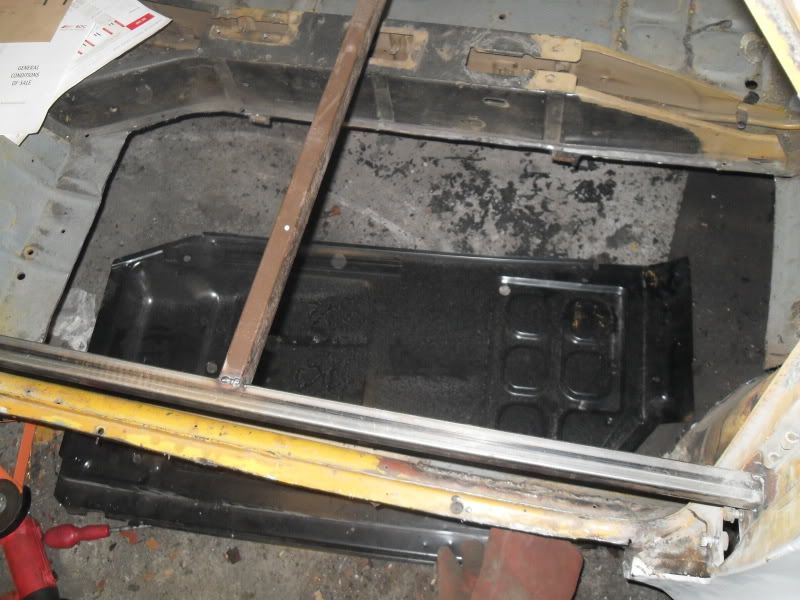
The steering shaft looks pretty good too. Properly welded in, so no issues there.

Heater controls though... not so much. the entire system is shagged. Corroded everywhere theres metal, and an antiquated aircon system. I make the logical decision... out comes the aircon. I think replacing the heater with a mini's one might be a solution. Up goes the "hood":

Here she is. 5.7 (350ci) Chevy smallblock. Rochester quadrajet replacing the stock injection system, otherwise pretty run of the mil...er... mill. Mind you, half of it is surplus to requirements, so out comes the aircon compressor:

condensor and whatnot....

Still to establish if the core is separate from the radiator up front. If so it will come out too. Not shooting for weight savings here (its a big 80s yanktank) just neatness...

Ran out of time before i could attack all of the heater/aircon blower assembly (found at the top right above the drivers footwell) but it will be next in line. If i can get a heater assembly to part from the aircon and work independantly and efficiently I will persevere with it, otherwise i will be putting a non-stock blower and matrix in there to be done with it. As for the biggest potential issue of second gear whine, i bought a service manual for the T5 box to see whats involved in potentially replacing and rebuilding it to take more power, but if its gonna be costly i can see me just finding a replacement. The box came as standard in old TVRs, cossies and a few others, so they should be common on the 'bay.

Still to come: Hedman headers, custom exhaust, Holley 780CFM carb (yep, its bought), snap off aftermarket steering wheel, and some engine dress-up. Just finishing a job in Norway first!

Have a happy new year y'all!

Friday 24 December 2010

Back from Kazakhstan...

...and not a moment too soon. Now, there are a few things i better get everyone up to speed on. The first is the affair i have been having. Kinda. You see, there was another car in my life, outside of this blog. The Supra:


Now though she has been sold. Essentially i had most of my "car funds" tied up in her, and she wasnt getting used anywhere near as much as she should have been. 3 days after i got back from Kaz, a friendly Norwegian had arrived and gave me a load of money. So now we are down to 3 cars: MR2, Silvia and Passat for the daily stuff.

Not quite. Sadly over the course of the winter the wee MR2 has not faired so well. An avalanche, lack of antifreeze and a dodgy window wiper mechanism now means the wee classic is not in the best of health. As a result i have to get her fixed up fairly smartish because my better half actually uses it and needs it. With this being the potential to be a new head gasket if the antifreeze incident is the worst case, the garage will need to be used, and as a result this meant one sad but inevitable result.

The Silvia had to be scrapped.

As sad as this is, i cant say i feel a great deal of loss at this. Granted the car was a project and has now been abandoned, but to be fair the V8 was all that had been worked on, not the car. Since the V8 can remain i see no reason not to get the car scrapped and focus on the more pressing matters at hand, then resuming a slow burner project at a later point in time. Perhaps a Caterham V8?

Anyway, for those keeping count, thats 2 cars. But for how long you ask?? About 20 minutes before i found this:

Will explain more in the next instalment!

Saturday 4 December 2010

An update from Kazakhstan

As i write this i am on my 5th week in Aktau, a remote desolate ex-soviet hellhole in west Kazakhstan, by the Caspian sea. Due home towards the end of next week, and i will have a LOT of things to be getting on with. Some of my purchases i will run through with you all right now. (These have all been made via the gift of eBay or through internet forums. Paypal is a tool that will inevitably bankrupt me.)

7 inch electric polisher/Mop: a variable speed mop and polisher. No real need for this at the moment for any car in the garage, but my Supra has been long overdue a buff down, so this will be handy. And home resprays will be made a lot easier with this

Range Rover 96- 4.6litre sump and dipstick. Not neccesarily a required thing either, but the auction came with a long reach sump pick up, so will make things a lot neater down there. Might have a crack with the 4.6 sump too if i can see any advantage with it. The seller also threw in the 4.6 timing cover which removes the distributer drive. Definitely no need for this so it will either be sold on or i may keep it for a future converion to electronic ignition via coilpack and ECU...

Twin Weber 45 carbs. Definitely not for me. Will be giving these to my bro for his scirocco as an xmas present. If i dont they stand the danger of ending up on my AW11 mr2. Not a good idea as this was meant to be the sensible car while all this monkey wrenching goes on...

A lathe. Very handy bit of kit. More of a joint buy from me and Simon, but will do a more comprehensive write up once i'm back and get the badboy running right.

DTI, micrometer, various lathe tools: See above

A TOMS airscoop for the AW11: Wat can i say, i'm a poser. And it came in the right colour so will be a bolt n toy.

15 inch alloys: 4x100 so will be going on the above. The aw11 is currently running horrific 3 spokes of unknown 90s heritage. Pics to follow.


Thats about it from me for this week. Slow progress indeed due to work, but the purchases made whilst away will ensure some fairly detailed and large jumps in progress!

Stay tuned!

Sunday 21 November 2010

Filling holes

Well this week i have been putting in the prep work for welding in the floor and sill, here is me drilling the holes in the old sill. The floor was lind up and seam welding on the underside as well as spotwelding all the way around.


Floor getting lined up with various clamps and big pesuading hammer


The inner arch was trimmed back in order to get some clean metal at the flange was totally rotten, plus i will be able to tub the front arches for maximum wheel clearance to get as large a disk brake set-up as possible.


The sill was drilled and the floor was prepped for the new sill going in, the sill has been spot welded and the arch was trimmed back so the bad metal can be cut back.


Next i am slowly filling in the inner arch so it can be tubbed, as can be seen all the welds have been sprayed with a zinc primer in order so the panels don't rust.


This weeks problem is going to be bodywork and this sill.


As you can see from the previous posts it fits well however atthe back it is miles out, i will need to do some cutting and shutting inorder to get this one blended in. Please send answers on a postcard.


Monday 1 November 2010

I am Iron Man...

Just a short update before i leave. Set for a month trip to Khazakstan for work as of tomorrow so there will be a bit of silence until next time...

As a result i didnt want to embark on anything drastic until then. Dont like to leave things half finished! I cleaned up the top end parts of the engine and set about detailing them. As this is the part most often seen when the bonnet is up i thought a striking colour scheme was in order. Something unseen on RV8's from what i have researched. The result was this:

Cam covers in red, Inlet manifold in gold. Took a bit of inspiration from Iron man. A bit different!

Will get a proper pick of the engine rebuilt next month when i get back. That way i can get the lump in the bay again, prepped, and ready for the fabrication of the mounts!

Stay tuned!

Thursday 28 October 2010

Post hiatus

Yep, been a long while since i last posted too. Various holdups for myself, although a laptop virus has been the main reason. Still, all fixed now!

So heres where i'm at. Sump has been fabricated after sourcing some metal. Its a bit Heath Robinson but it will hold the fluid needed and sit in the right place. I mean, who looks at a sump anyway??


With a new sump comes a new oil pick up. The original sat bang in the middle, and would need to be completely altered for the new sump. 


This was a case of chop, angle and reweld with a few extra lengths of 10mm ID steel tubing.
After a bit of choppy weldy, it was done:
Its not the prettiest but it should work. Still need to test it to see if there are any leaks in the welds. I know there are in the sump so it will be getting a coating of chemical metal shortly... just along the weld lines.

As we were a week before payday i decided to hit up a bit of free improvements... degreasing! Messy, time consuming but fundamentaly cheapy cheap!


This allowed for a prepped surface for painting and adhesion for the chemical metal. Heres the first step of painting:

In amongst all this we have been trying to get the garage itself up to spec. So far we have been using 1 mains socket and several extension leads for all our work. No more! I have wired in some more sockets at the benches to the rear of the garage. That ought to speed things up a bit!
...should be finished those in the morning. Stay tuned!

Thursday 23 September 2010

i have returned, the rust never left

Well it's been a while since i've posted so it may be quite a ramble, are you sitting comfortably?

The theme of todays post is going to be rust! Now i was as surprised as you guys are going to be when i say, Fiats rust. Being a sister company of Lancia you would have thought they would of Learned from the Pro's how not to do it, but no, they thought they would follow suit.

For the past week and a half i have had the horrible job of scraping as much underseal off of the floor as i can so i could asses what actually should stay and what should go, sadly there is a lot of the later!

I have discovered that the main points that the rust has taken hold is at the sills and the floor and the inner front arches.

Front of the sill, or where it should be, and the chassis leg that just sort of peeled away!


Looking up from the last photo to the inner arch, luckily the structural mounts for the damper and wish bone have been preserved


The following pictures showing the condition of some rather ropey floor repairs


So i have taken the plunge and bought some things:

2 new floor pans, and the complete inner and outer sill assembly for both sides.

In preparation for the new bits i've braced the shell as if i was just to cut out the sill and floor there would be some serious re-alignment issues, thanks to Tommy to the obligatory welding shot, also my friend kyle has lucked in with a well placed Chizfab sticker. ( Google it it's good stuff)


So thats how the car stands so far, braced and ready for the new floors and sill which will be arriving at the end of this week.

I'm quite nervous and excited as this will be the start of actually putting it back together, but i've never done anything like this before. Just have to wait and see the results!

Tuesday 21 September 2010

The engine prep begins..

Had the engine sat on the floor at the end of the last blog post. Not the best for working on it, especially with the sump off as one slip would have it landing on the crank and potentially buggering up something serious. So today i was off to Machine Mart with strict instructions ONLY to buy an engine stand. Almost managed it too!

Once back i had to shed some weight off the V8 to make it stable on the stand (max weight 250kg). First off came the inlet manifold. Amazingly all of the loom is associated only with the inlet, so once its off, the rest of the block is exactly as a carb block would be!

Inlet trumpets look pretty meaty once off too:
once off i could get the remaining block up on the stand, flipped, sump face cleaned and covered:
Covering the crank fairly essential with all the grinding and dust going on about in the workshop, so to do my bit for the planet, i decided to do a touch of recycling:
Thats about it for the engine side of the game for today. Need to chop about the sump tomorrow and make some fabricated panels for it. On the engine bay side, i got the old mounts that were deemed unnnecessary chopped and off:
...which frees up a bit more space in there. On the downside i did managed to plough the grinder straight through the front O/S brake line. To stave off my fury, i do conceed that it looked a bit corroded, so ive probably saved myself a bit of hassle by forcing myself to change it now!
My other engine bay plans included removing the steering rack. At the moment i cant see where exactly i am moving it too, but as long as its out the way for fitting the engine, i ca work out the relocation at a later date:
Simon also surfaced at the garage today, so it was a bit more exciting than my usual banter free work efforts!

Thursday 16 September 2010

Trail fit #1

Today was a good day!

I cracked in fairly early, and set up the borrowed engine stand (props to Norman for the loaner!) for the ultimate goal- a trial fit of the block to see if i need to chop out any bodywork etc, and to see what stays and goes on the V8. First things first, get the V8 slung up:


...and ready to lower in. I decided to keep the box off for this, mainly due to being on my own for this part but also due to knowing it would probably not fit. Once the V8 is sorted for height, i can then think about longitude location with the box in place. This is compounded by not actually having a shifter mechanism to align with the gearshift hole on the chassis, so i can hunt about for a correct fitment once its in, as BL made a fair few!


Once lowered into place i found things to be a lot better than expected! Plus points include plenty of space for manifolds either side of the block. I predicted massive restrictions here but in fairness i got off lightly...

ball park measurements give me around 3 inches either side to play with, so that will make positioning laterally a walk in the park...


Its a great feeling to stand back and see roughly what the final product will look like:
Should look good, but its not a fault free fitment. First up, and as predicted, the Sump WILL need a massive alteration:
This shows that the engine sump is basically sat on the subframe for these pictures. A radically altered sump bowl, to the front of the block rather than the rear, will have to be sourced or fabricated (most likely the latter). Next issue was this:
  
The steel bar indicates the bonnet line. Major chopping will be required for clearance, but to be honest once the sump is altered the block should drop a good few inches. This isnt going to be something to concern me until the last final fitment. Another problem i thought i would have cropped up:

This is the rear drivers-side bank. Dependant on how much drop i get, the clutch master may still foul. Inboard pedal box is still on the cards until the engine mounts are finished. Also, heater pipes are going to be a complete foul, so they may get repositioned. Again, tertiary things for the instal, and can be worked around. What isnt a tertiary problem is this:

Bloody starter motor is indeed going to foul as i thought.There may be a race-spec starter with a smaller body i could use for this to get around it, but more likely is the need for a steering rack alteration. The plan is to get the engine mounted and welding done, then see exactly how much of a prick this will be...

The above pic shows it from a different angle (front of car facing to the rear). Remember thought that the engine will drop by 3 or 4 inches so that will bring the circular casting right in line with the column shaft. Suck it and see i guess. Oh, and dont thing that the engine mounts line up either!! Side on they are a good 8 inches out of alignment. The Sil's mounts are getting cut off to give clearance, and the V8 ones will be used to connect up to solid mount plinths i will fabricate onto the chassis rails!

So is that my lot? Easy sailing from here on? No chance. One more engine hitch to contemplate:
The oil filter. For some reason they face forward and down on the RV8. Im sure that makes it ideal for changing and access, but it will cause a foul on my ARB (anti roll bar) and bracing chassis leg. ARB could be repositioned, and probably will be in the long run, but i aint chopping strengthening legs for the sake of an oil filter. Best solution will be a remote take off for a stand alone filter, with the added bonus of being ready to tap if i decide to plumb an oil filter. Simples.

The front pump and belt assembly is a touch close to the slam panel but i cant judge that accurately until the box position is determined. Nonetheless i am bracing myself for a radiator mounted under the slam panel and an expansion bottle to reduce airlocks.

Once i got my measurements and had a good giggle at how good it looked, i pulled the lump back out to get cracked on. Ripped the sump off to make ready for the custom fabrication i will need to do, and in the process had a look at the oil pick up line.
Some chinks of debris in there, and a couple of them metal. Not too concerned about it though as lets face it, if they are snagged in the pick-up filter then they aint buggering the pump etc.
...and thats where i left it. 3pm finish today as the Pope is in town buggering with my traffic plans. Next stage is to take the angle grinder to that sump and start making up a new oil pick-up feed.

Stay tuned!