Thursday 23 September 2010

i have returned, the rust never left

Well it's been a while since i've posted so it may be quite a ramble, are you sitting comfortably?

The theme of todays post is going to be rust! Now i was as surprised as you guys are going to be when i say, Fiats rust. Being a sister company of Lancia you would have thought they would of Learned from the Pro's how not to do it, but no, they thought they would follow suit.

For the past week and a half i have had the horrible job of scraping as much underseal off of the floor as i can so i could asses what actually should stay and what should go, sadly there is a lot of the later!

I have discovered that the main points that the rust has taken hold is at the sills and the floor and the inner front arches.

Front of the sill, or where it should be, and the chassis leg that just sort of peeled away!


Looking up from the last photo to the inner arch, luckily the structural mounts for the damper and wish bone have been preserved


The following pictures showing the condition of some rather ropey floor repairs


So i have taken the plunge and bought some things:

2 new floor pans, and the complete inner and outer sill assembly for both sides.

In preparation for the new bits i've braced the shell as if i was just to cut out the sill and floor there would be some serious re-alignment issues, thanks to Tommy to the obligatory welding shot, also my friend kyle has lucked in with a well placed Chizfab sticker. ( Google it it's good stuff)


So thats how the car stands so far, braced and ready for the new floors and sill which will be arriving at the end of this week.

I'm quite nervous and excited as this will be the start of actually putting it back together, but i've never done anything like this before. Just have to wait and see the results!

Tuesday 21 September 2010

The engine prep begins..

Had the engine sat on the floor at the end of the last blog post. Not the best for working on it, especially with the sump off as one slip would have it landing on the crank and potentially buggering up something serious. So today i was off to Machine Mart with strict instructions ONLY to buy an engine stand. Almost managed it too!

Once back i had to shed some weight off the V8 to make it stable on the stand (max weight 250kg). First off came the inlet manifold. Amazingly all of the loom is associated only with the inlet, so once its off, the rest of the block is exactly as a carb block would be!

Inlet trumpets look pretty meaty once off too:
once off i could get the remaining block up on the stand, flipped, sump face cleaned and covered:
Covering the crank fairly essential with all the grinding and dust going on about in the workshop, so to do my bit for the planet, i decided to do a touch of recycling:
Thats about it for the engine side of the game for today. Need to chop about the sump tomorrow and make some fabricated panels for it. On the engine bay side, i got the old mounts that were deemed unnnecessary chopped and off:
...which frees up a bit more space in there. On the downside i did managed to plough the grinder straight through the front O/S brake line. To stave off my fury, i do conceed that it looked a bit corroded, so ive probably saved myself a bit of hassle by forcing myself to change it now!
My other engine bay plans included removing the steering rack. At the moment i cant see where exactly i am moving it too, but as long as its out the way for fitting the engine, i ca work out the relocation at a later date:
Simon also surfaced at the garage today, so it was a bit more exciting than my usual banter free work efforts!

Thursday 16 September 2010

Trail fit #1

Today was a good day!

I cracked in fairly early, and set up the borrowed engine stand (props to Norman for the loaner!) for the ultimate goal- a trial fit of the block to see if i need to chop out any bodywork etc, and to see what stays and goes on the V8. First things first, get the V8 slung up:


...and ready to lower in. I decided to keep the box off for this, mainly due to being on my own for this part but also due to knowing it would probably not fit. Once the V8 is sorted for height, i can then think about longitude location with the box in place. This is compounded by not actually having a shifter mechanism to align with the gearshift hole on the chassis, so i can hunt about for a correct fitment once its in, as BL made a fair few!


Once lowered into place i found things to be a lot better than expected! Plus points include plenty of space for manifolds either side of the block. I predicted massive restrictions here but in fairness i got off lightly...

ball park measurements give me around 3 inches either side to play with, so that will make positioning laterally a walk in the park...


Its a great feeling to stand back and see roughly what the final product will look like:
Should look good, but its not a fault free fitment. First up, and as predicted, the Sump WILL need a massive alteration:
This shows that the engine sump is basically sat on the subframe for these pictures. A radically altered sump bowl, to the front of the block rather than the rear, will have to be sourced or fabricated (most likely the latter). Next issue was this:
  
The steel bar indicates the bonnet line. Major chopping will be required for clearance, but to be honest once the sump is altered the block should drop a good few inches. This isnt going to be something to concern me until the last final fitment. Another problem i thought i would have cropped up:

This is the rear drivers-side bank. Dependant on how much drop i get, the clutch master may still foul. Inboard pedal box is still on the cards until the engine mounts are finished. Also, heater pipes are going to be a complete foul, so they may get repositioned. Again, tertiary things for the instal, and can be worked around. What isnt a tertiary problem is this:

Bloody starter motor is indeed going to foul as i thought.There may be a race-spec starter with a smaller body i could use for this to get around it, but more likely is the need for a steering rack alteration. The plan is to get the engine mounted and welding done, then see exactly how much of a prick this will be...

The above pic shows it from a different angle (front of car facing to the rear). Remember thought that the engine will drop by 3 or 4 inches so that will bring the circular casting right in line with the column shaft. Suck it and see i guess. Oh, and dont thing that the engine mounts line up either!! Side on they are a good 8 inches out of alignment. The Sil's mounts are getting cut off to give clearance, and the V8 ones will be used to connect up to solid mount plinths i will fabricate onto the chassis rails!

So is that my lot? Easy sailing from here on? No chance. One more engine hitch to contemplate:
The oil filter. For some reason they face forward and down on the RV8. Im sure that makes it ideal for changing and access, but it will cause a foul on my ARB (anti roll bar) and bracing chassis leg. ARB could be repositioned, and probably will be in the long run, but i aint chopping strengthening legs for the sake of an oil filter. Best solution will be a remote take off for a stand alone filter, with the added bonus of being ready to tap if i decide to plumb an oil filter. Simples.

The front pump and belt assembly is a touch close to the slam panel but i cant judge that accurately until the box position is determined. Nonetheless i am bracing myself for a radiator mounted under the slam panel and an expansion bottle to reduce airlocks.

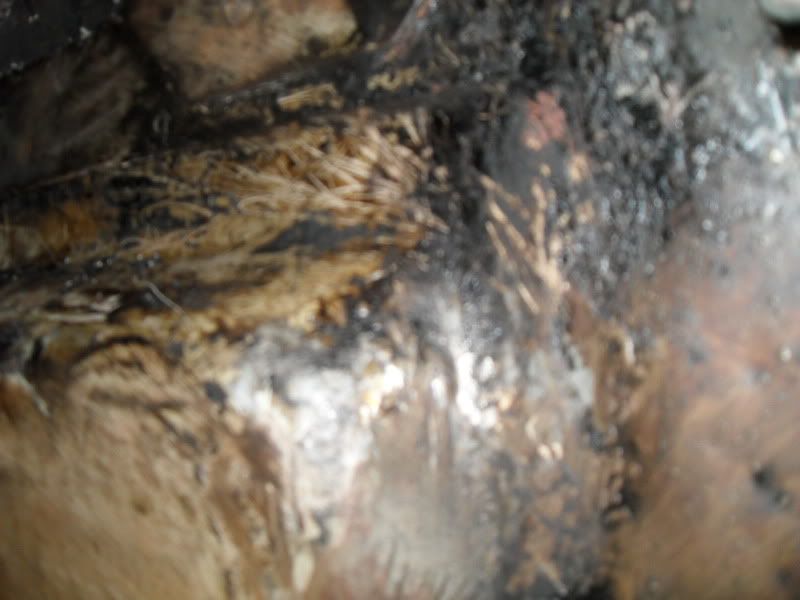
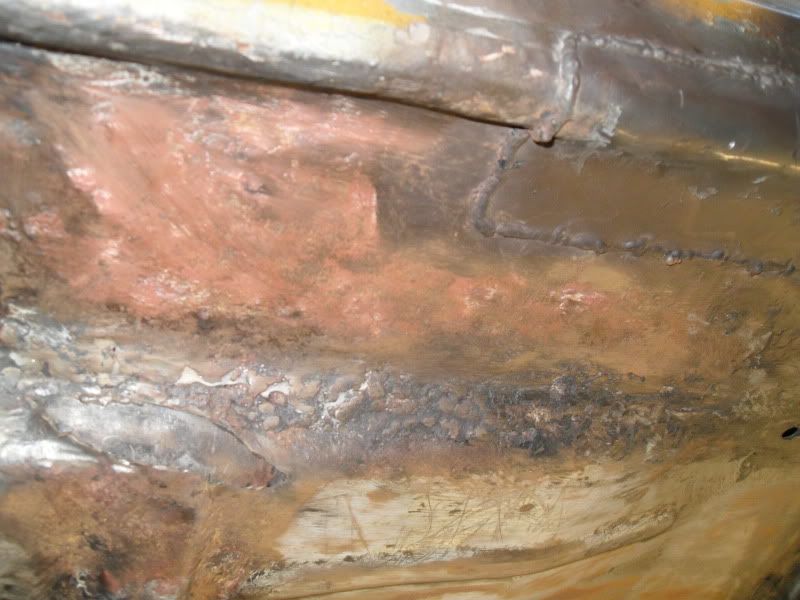
Once i got my measurements and had a good giggle at how good it looked, i pulled the lump back out to get cracked on. Ripped the sump off to make ready for the custom fabrication i will need to do, and in the process had a look at the oil pick up line.
Some chinks of debris in there, and a couple of them metal. Not too concerned about it though as lets face it, if they are snagged in the pick-up filter then they aint buggering the pump etc.
...and thats where i left it. 3pm finish today as the Pope is in town buggering with my traffic plans. Next stage is to take the angle grinder to that sump and start making up a new oil pick-up feed.

Stay tuned!

Tuesday 14 September 2010

further inspection

Had a quick blast at things for an hour or so today. My daily driver is in for repairs so i had to do a bit of running around sorting a hire car out... so what did i get done?

Axle stands were high in my list of needed parts so i grabbed an old set from my stash of junk. Once the car was up i addressed the clunking, hanging prop. Its a split prop with a centre bearing, and is completely different from the flange on the V8 box. i parted it at the intermediate flange and took it off for proper inspection.

The centre bearing is a bit on the soft side, but otherwise seems in decent nick... thats the bearing mount on the right, and the top of the prop is what attaches to the box. As seen, its an internal flange with a machined outer... completely different from the traditional style 4 bolt flange as found on the V8 box...


A point of note though, the intermediate flange on the silvia diff end prop IS a 4 bolt flange (below). I will see if these are compatible with the V8's 4 bolt. If so then getting another intermediate shaft, parting one end off and making a connector shaft out of 2 may be an option.

Next up, i had just enough time to take off one of the engine mounts for the old 4 banger block. Awkward doesnt come close to describing the removal of this. Once removed though it has filled me with a bit more confidence about having the space to squeeze the V8 in there. Below is the one i couldnt get off due to time restraints...
...and below is the one i did get off on the other side...


A lot more room for stuff now, i'm sure you'll agree. I may still go one step further and grind off the angle plate that the mounts fit to, as i am intending on mounting the V8 on the crossmembers rather than the subframe.

On the subject of angle grinding, i did refrain from hacking the back off this afternoon. That may still be tomorrows task though......................

Monday 13 September 2010

Getting underway...

Been a bit quiet of late. Work for me has been fairly busy recently, and i had tickets to JAE last weekend, so that has been occupying my time lately. Today was my first opportunity to properly get in about the Silvia.

First up, the front end. I had to take apart as much as i could to allow enough space to put the V8 in and maneuvre it around in the bay. Also, it will be fairly awkward so i stripped out any critical parts that could be damaged and potentially hard to replace. Essentially, this is the entire front end!

Pardon the belly, but those old overalls are about 3 sizes too small! What i'm left with now is the basic chassis. All lights and gubbins are away so i can properly measure out space for radiator and ancillaries, etc, and more inportantly get as much access for measuring up and templating the engine mounts. As said, these will have to be made from scratch, so i want to make it as painless as possible.

Since taking all the mechanisms and supports for the pop up headlights out, i have been contemplating a slimline headlight arrangement to replace them up front, something similar to a Nissan S14a or PS13. Naturally this is many months away but if i see a cheap set of lamps crop up i may take a punt and make them fit... ;)

Next task was to take the prop and exhaust off to see what space i would be left with underneath for the new box and potential routes for the downpipes. No such luck here as i forgot to bring up any axle stands and dont fancy fannying around under an unbalanced shell without them. Will get my old set tomorrow and get the car up in the air. Another reason i'm keen to get under there is to be certain I wont be hit with unexpected rust!

So i moved onto the only thing left to tackle with limited tools: The rear hatch. Never been a fan of the back of the car. Something out of proportion about the features, and the overhang strikes me as ungainly for a car with such a short wheelbase. To help me plot out some ideas i decided to remove the hatch. As you can see this dominates the entire rear of the car, and leaves a substantial amount bare once deleted...


The car almost resembles a saloon in its side profile without it. Will wheel it out to the yard and take a wide angle shot of the side with the hatch off to help me chew over my plans for the rear, but i am considering a pick up.

Yes, a pick up.

My thinking is to create a larger B pillar coming down along the roof line left by removing the hatch, and chopping the remaining metal support for hatch and the C pillars. I think a bit of photoshopping may be required just to be sure, before i start getting handy with the grinder!

Coming up: Car goes in the air, appraisal of underneath, paint prep and pedal box shennanigans!


Ps, for those awaiting progress on Simons front, he is on a break in Bath (the town, not the trough) and will return later this week!